Secure shell (SSH) is the workhorse of a UNIX system administrator. Due to its ability to secure connections, protect login details, provide authenticity and even tunnel traffic, SSH replaced telnet in the real world many years ago. Authenticity is not guaranteed, and for administrators working with a large farm of servers it's important to ensure you're talking to the server you really wanted, and not something that's moved into its place.
SSH employs a private/public asymmetric keying system, keeping a private key closely guarded and using the public key to not only secure the connection but help prove that you're talking to the right server. Most SSH clients will allow you to remember the public key for a server after your first connection; ensuring subsequent connections are to the same server by revalidating a hash of this key, known as a “fingerprint”. To help validate the fingerprint on your first connection, you can store a fingerprint of the SSH server's public key in DNS for additional verification.
Most UNIX systems these days automatically generate a new key-pair for the SSH server upon installation, or at least upon the first time the SSH server is started. If you're installing a SSH server like OpenSSH (originally developed for the OpenBSD project, but now easily the most popular SSH package available), you'll need to generate your own keys before starting the server.
Some systems prebuild weak keys (presumably because they're faster to generate and use), so it could be useful to regenerate fresh keys with stronger properties (note that DSA keys can only be 1024-bit keys). To generate a new key-pair for OpenSSH using a 1024-bit DSA key and a 4096-bit RSA key, and then restart your SSH server, you can use the following commands (change as appropriate):
[geshi lang=bash]ssh-keygen -t dsa -f /etc/ssh/ssh_host_dsa_key
ssh-keygen -b 4096 -t rsa -f /etc/ssh/ssh_host_rsa_key
killall -HUP sshd[/geshi]
Once you have your keys generated, you'll want to store their fingerprints in DNS. This is done using SSHFP records of the following format:
<hostname> IN SSHFP <key-type> <hash-type> <fingerprint>
Where the hostname is your hostname (obviously), the key type is 1 for RSA or 2 for DSA, and for now the hash type is always 1 for SHA-1 (no other hash algorithm has been defined yet). The fingerprint is a hash of the public key (using SHA-1) represented in hexadecimal notation.
OpenSSH provides an easy way to extract the fingerprints from the key files. It's so easy because it even gives you the lines ready to be entered into straight into your DNS zone file. To extract all of your fingerprints, you can use the following command (change the filenames where appropriate, but this targets the public key files in most installations):
[geshi lang=bash]for key in /etc/ssh/ssh_host_*_key.pub; do \
    ssh-keygen -r `hostname` -f $key; \
done[/geshi]
If your DNS server doesn't support the SSHFP DNS record type, you can add the -g parameter to ssh-keygen (before -r) to output generic records. You should have an output similar to the following:
your.host.name.here IN SSHFP 1 1 d9a0491e25eb1572f60ba46cca609842dc18bea4
your.host.name.here IN SSHFP 2 1 a5f4f0a939b5b52c75325fb0666f7ed6a2d78505
Most installations of OpenSSH don't seem to enable this by default. For testing, you can run OpenSSH like this:
[geshi lang=bash]openssh -o VerifyHostKeyDNS=yes myusername@your.host.name.here[/geshi]And you should see something like this (notice the text in underline):
The authenticity of host 'your.host.name.here (fd1e:f58b:a4b6:e8ff::1)' can't be established.

RSA key fingerprint is 39:62:32:ea:da:37:1e:bd:21:d3:37:48:d8:e5:55:25.

Matching host key fingerprint found in DNS.

Are you sure you want to continue connecting (yes/no)?
Once you have it working, you'll want to add VerifyHostKeyDNS=yes to your SSH client configuration file (usually /etc/ssh/ssh_config or if you want it just for your client, add it to ~/.ssh/config).
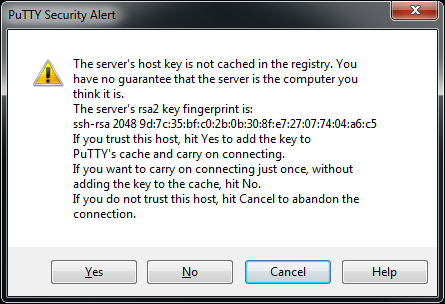
Unfortunately the great and powerful PuTTY doesn't support this yet, and may not for some time to come.
There are a few things left to remember, which seem obvious but could be forgotten:
- Once you add these lines to your zone, don't forget to update the serial number in the SOA and reload the zone file.
- If you regenerate new keys (i.e. they were compromised or you have replaced the server), don't forget to update DNS!
- When changing fingerprints in DNS, don't forget that they might be cached depending on how you've configured your TTLs.
- This is not a guarantee! It's another level of reassurance as to the validity of the key, but don't forget that DNS can also be compromised.
- Unless you're running DNSSEC (and your client host is using it properly), the fingerprint may be modified in transit.
Ultimately it's still best that you verify the public key fingerprint out-of-band (i.e. physically write it down while at the console of the server) and enter it into your known_hosts file (or equivalent) before connecting to the server, or verify the fingerprint upon connection manually, but this helps a little bit for us lazy IT people.
This only plugs a small hole and doesn't suddenly make your installation secure enough to be used by international spies. Use it in conjunction with a well-planned security implementation.